
Evenings for Educators October 2017 Sneak Peak Blog: African Batiks made with Toothpaste!
by Janice Harris
10/17/2017
Evenings for Educators is the museum’s monthly teacher development program. Each event features two teachers (one Elementary and one Secondary) who create and implement a lesson plan in their classroom. Attendees get a copy of that lesson plan in their folders the night of the program and also have the chance to ask the Museum Teachers questions. Each lesson references artwork from the museum’s permanent collection, ties into the theme of the program and incorporates visual art with another discipline. Please enjoy this sneak peak of the Elementary lesson plan by Museum Teacher Janice Harris.
October 19th, 2017 Museum Teacher: Janice Harris
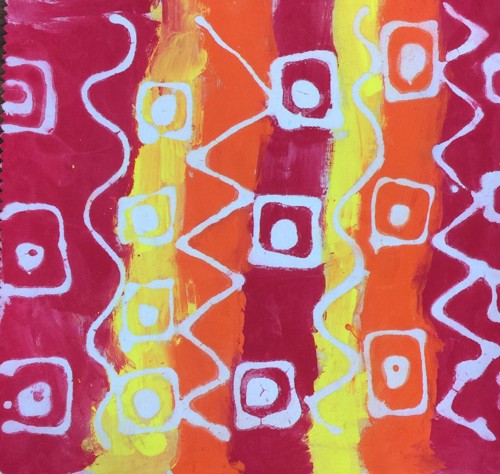
This lesson would be appropriate for grades 1st-6th. I taught this lesson to my first graders. We began the lesson by looking at the image of the Mali Blanket from the Cincinnati Art Museum. We also looked at lines in patterns in other blankets and batiks from Africa as well as patterns on animals. Students then drew patterns and lines with a pencil on copier paper and then traced the designs with a black fine tip marker.
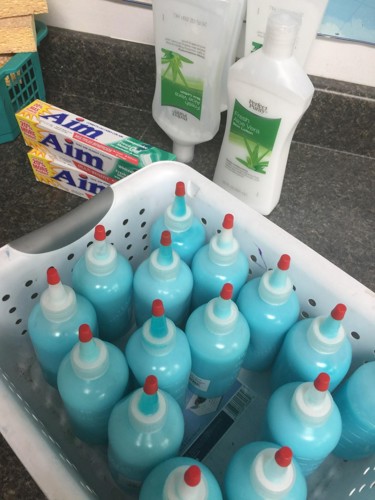
The next step was to place a piece of fabric over the designs and trace over it with the toothpaste-lotion mixture. I used a half and half mixture with a little more of the toothpaste than the lotion. I purchased the fabric squares (also called quilt squares) from Amazon. A pack of 42 was around ten dollars. I recommend having the children trace their fabric onto a heavy piece of cardboard or a tray. I bought enough trays for each student years ago and they come in handy for various projects. When the students were done tracing over their lines with the mixture, I had them bring me their trays and then I transferred them onto the drying rack (I put poster board on the racks to keep them from falling through). Our room smelled so minty fresh!

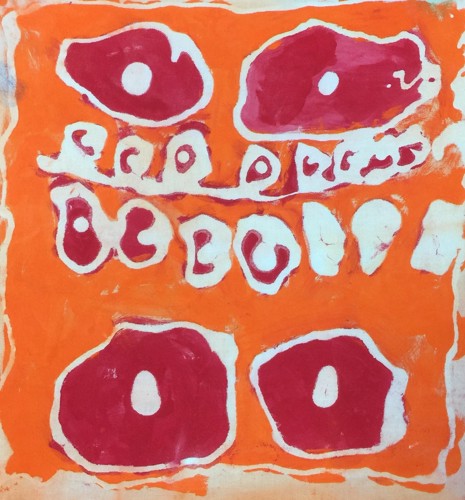
On Day Two we discussed warm and cool colors and what colors would look good together. We used Dick Blick’s premium tempera paint (don’t use washable paint or the colors will rinse out) and painted our fabric. Remind children to paint on the mixture side!
On Day Three students rinsed off the mixture. I found that it works best to rinse them under running water so the lines don’t become muddy. After they dried I took them home and ironed all of them (yes over 230) but it didn’t take long. You could probably get away with not ironing them. I wanted them to lay flat so they would look good hanging up. All my students were successful at this and they loved it.
Cincinnati, OH 45202
Toll Free: 1 (877) 472-4226
Museum Hours
Museum Shop
Terrace Café
Library
Cincinnati Art Museum is supported by the tens of thousands of people who give generously to the annual ArtsWave Campaign, the region's primary source for arts funding.
![]()
Free general admission to the Cincinnati Art Museum is made possible by a gift from the Rosenthal Family Foundation. Exhibition pricing may vary. Parking at the Cincinnati Art Museum is free.
Generous support for our extended Thursday hours is provided by Art Bridges Foundation’s Access for All program.
![]()
General operating support provided by:

![]()